Showing posts with label sterile. Show all posts

Thursday, January 5, 2012

Little Victories

Progress!  The tiny green dots in the blurry photo below are actually what this blog madness is all about:

Epidendrum Orchid Protocorms In Vitro
©2012 MadOrchidist.com
These Epidendrum seeds have germinated; at this stage, the little green balls of undifferentiated and dividing cells are called protocorms.  Most importantly, there are no obvious signs of contamination! All three of the flasks I made up with these seeds (dry and then sterilized) are looking good; here is another one:

Succesful Orchid Germination
©2012 MadOrchidist.com
In this case, the orchids themselves (reed-stem Epidendrums with no ID) aren't that exciting, but that fact that I was able to sterilize, flask, and germinate them successfully at home is.  In fact, of the more than a dozen mother flasks I have sown with various seeds so far, none are showing any contamination (yet) - a good sign that my home-grown laboratory and procedures are viable.

Further progress toward my eventual goal of actually breeding my own new orchids is also being made.  Today I noticed that the seed capsule of the first cross I made back in July 2011 has matured.  It is turning yellow and has just begun to split at the end where the flower was.  This eliminates any chance of sowing these with the "green pod" method, since I must presume the seeds are contaminated now that they have been exposed to the outside world.  I will definitely get on to flasking them up soon.

LaleoCattleya Seed Capsule Maturing
©2012 MadOrchidist.com
These will hopefully be the fist new orchids that are completely my own, from pollination to germination.  This was just the shot of encouragement I needed to stay excited about this orchid odyssey . . . 

Sunday, January 1, 2012

New Year's Flasking

Happy New Year!  2011 was the beginning of a new chapter in my orchid hobby, and I am looking forward to continuing the madness in 2012.  I started off right, with some ambitious orchid seed flasking.

A while back I ordered dry seeds of a few orchid species from Thailand on eBay.  They arrived in tidy little packets, and I popped them in the refrigerator for safe keeping until I could get around to them.  I actually only ordered the first two in the picture below; the seller threw in a couple of others.  What a nice surprise!

Gastrochilus bellinus, Ascocentrum ampullaceum,Dendrobium pachyphyllum, and Gastrochilus patinatus
©2012 MadOrchidist.com
Here's an open packet showing the bright yellow seeds of Dendrobium pachyphyllum:
Dendrobium pachyphyllum Seeds
©2012 MadOrchidist.com
And here are is a closeup of some of the Ascocentrum seeds using my iPhone and an antique dissecting microscope - what a cool combo!  If you look closely, you can see the fibers of the white printer paper to give you a sense of how small they are:
Ascocentrum ampullaceum seeds magnified under my stereo dissecting scope
©2012 MadOrchidist.com

I got a little ambitious and decided that I would try to sow all four species in one flasking session in the glove box.

Orderly Preparation - don't want to mix them up!
©2012 MadOrchidist.com
After numbering and labeling syringes to correspond to the right species and flasks, I got to sterilizing the seeds. 

Orchid Seed Solution
©2012 MadOrchidist.com

Since my first attempt hasn't yet shown any contamination, I used the same procedure for these seeds.  The biggest difference is that I did four syringes instead of one, and I only used the "filter" cap I made on one of them.  The others I just let settle a bit longer after every rinse to avoid squirting out too many seeds.

Once more into the box
©2012 MadOrchidist.com
Four at once turned out to be a bit more than was comfortable.  It required me to have a lot more stuff in the glove box (multiply empty flasks and sterile water jars by four), and the possibility for cross-contamination or a mix-up seemed high.

Crowded and Messy in the glove box
©2012 MadOrchidist.com
Finally, mother flasks of the four species are sealed and out of the box.  This took a while, and it made me realize how non-ergonomic my glove box is.  I have to hunch over it to get the best view through the acrylic window on top while working, and it gets to my neck eventually.

New Orchid Flasks
©2012 MadOrchidist.com
The whitish particles below are a thin layer of seeds and water in a finished flask.

Orchid seeds in vitro
©2012 MadOrchidist.com

Here are some representative photos of these species from the Internet Orchid Species Photo Encyclopedia (click on the name below a photo for more info).

Gastrochilus patinatus

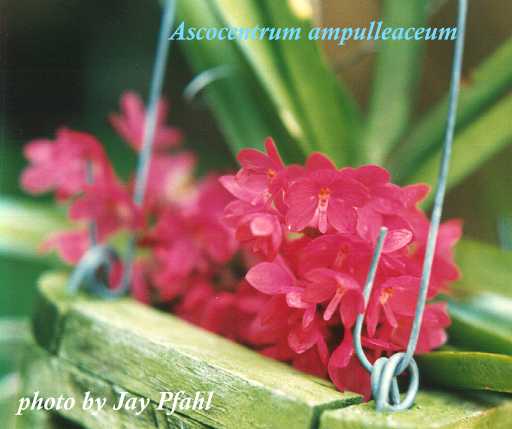
Ascocentrum ampullaceum

Dendrobium pachyphyllum
Gastrochilus bellinus

Monday, December 19, 2011

Flasking My First Orchid Seeds

This is what it's all about; sowing some Orchid seeds in flasks!  A couple of my own crosses capsules' are nearing maturity, but I couldn't pass up the opportunity to practice on some that just came along.

Epidendrum seed capsules ready for flasking
©2011 MadOrchidist.com
The other night was the Orchid Society Holiday Party.  Our host had some Reed-stem Epidendrums out in the yard that he says set seed all the time.  As it happened there was a dry pod that had split open and a green one still sealed, both on the same plant.  I have been considering whether I should go with the "green pod" method or wait for my pods to spit naturally and then sterilize the seed, and here was an opportunity to try both and compare!  He let me take them both to sacrifice to the learning process in my lab (thanks Van!).

Pod Parent Tag
©2011 MadOrchidist.com
Given that the Epidendrum was probably pollinated by an insect, I have no way of knowing what the pollen parent was.  All I know for sure is that the pod parent is pink; its tag is pictured above, plus I saw a few of the flowers on another spike.  Since this is sort of an experiment, I am not really worried about the pedigree.  If I end up growing anything from these they will be good for landscaping; Reed-stem Epis are practically bulletproof outdoors in this climate.  Let's hope the seeds are hardy too:

Epidendrum Orchid seed capsule dried and split open (dehisced), fine seeds visible
©2011 MadOrchidist.com

I decided to deal with the open capsule first.  Once an orchid seed pod dries, it splits open to release the thousands upon thousands (sometimes even millions) of tiny seeds inside.  After this happens, the seeds must be considered contaminated and their surfaces sterilized before sowing.

Epidendrum Orchid Seeds being sterilized in a syringe
©2011 MadOrchidist.com
I opted to use household bleach in a ratio of one part bleach to nine parts distilled water as my sterilizing solution.  Several online tutorials and discussions recommended using a syringe to clean the seeds.  I bought dispensing syringes with caps on Amazon.com and made one cap into a filter by melting a couple of holes in it with a heated pin and then placing a small piece of coffee filter inside.

Basically, I drew up about 10mL of the sterilizing solution through the filter cap and then banged the syringe on my hand and the table for at least ten minutes to try and eliminate all of the tiny air pockets that cause the seeds to float and prevent the solution from doing its job.  Below is a close up photo of the tiny orchid seeds in the syringe of sterilizing bleach solution:

Tiny Epidendrum Orchid seeds floating in sterile solution
©2011 MadOrchidist.com
 I put the syringe, several jars of autoclave sterilized distilled water (for rinsing seeds), a few pre-made flasks with seed sowing media, and a jar of stronger bleach solution (to clean the outside of the syringe and any tools I used) into my Glove Box and sealed it up.


Tools and materials in the glove box
©2011 MadOrchidist.com
It is unfortunately impossible for me to have my hands in the gloves working and take pictures at the same time.  At some point a small tripod and/or an intrepid volunteer will enable me to post more photos of what goes on inside the sterile glove box.

Briefly, I squirted out the bleach solution, drew up a rinse of distilled water a couple of times, and then squirted a small remaining amount of water with the seeds into a few flasks.  The result is pictured below:

Tiny Orchid Seeds in Flask
©2011 MadOrchidist.com

I got some seeds on the sides of the flask, but there are plenty in there on the agar media too.  I also ended up with more water than I would have liked in the flasks, so we'll see if that hurts things any.

I'll try to get to the green pod tonight or tomorrow so that I can make a fair comparison of the results.  I also received some seeds today in the mail that I ordered from Thailand on eBay.  I think I will give today's flasks a few days to see if contamination develops, so I can change my methods if necessary before trying again.  For now, those seeds will go into my pollen storage unit in the refrigerator.

As for these flasks, now we wait . . . it's a theme with orchids . . . 


Failure is Always an Option

Well the point of this blog is, at least partly, to keep track of my Orchid culture progress, so I would be remiss not to include the occasional failure.  Here are a few things that have not gone according to plan lately.

These first few photos are of flowers that were pollinated, but then withered away without developing a seed pod.  I am willing to give up enjoyment of the flower in return for a seed pod, but when you lose both it really stinks!

Cattleya flowers that were pollinated, but never went anywhere
©2011 MadOrchidist.com

Another Orchid Dud!
©2011 MadOrchidist.com


Laelia anceps that never developed pods - bummer, I had high hopes for these . . .
©2011 MadOrchidist.com 


These next few pictures are of the Dendrobium nodes that I flasked up in this post.  All three of them developed contamination.


contaminated Dendrobium node flask
©2011 MadOrchidist.com


The same flask as above, a few days earlier - that stuff grows fast!
©2011 MadOrchidist.com


The other two flasks developed fuzzy fungus
©2011 MadOrchidist.com

I had acknowledged previously that stems are tough to get completely sterile for this type of culture; now I know first-hand.  I could try to clean and replate them, but they were really just for practice and I'll probably let them go.

So, with some failures under my belt, I feel like I am making progress.  Next, on to some seed sowing . . .


Thursday, December 8, 2011

Laboratory Upgrade!

Today my Home Laboratory got a big upgrade!

Laboratory Stainless Steel Table!
©2011 MadOrchidist.com
 My boss gave me an old metal restaurant/laboratory table that the business no longer had a place for (thanks Pat). It has an 8 foot long, 2-1/2 foot wide stainless steel surface; you should have seen me unloading it from the truck by myself!  It has plenty of space to move all of my equipment out of the house and set up in the garage.

Moving the Equipment In
©2011 MadOrchidist.com
Once I moved everything to its new place, I got my dining room table and kitchen back!  Here is a picture of the situation before:


And After:

Now That's Sceincey!  Note My Antique Dissecting Scope At The Left.
©2011 MadOrchidist.com
There is even room for my insect collection stuff at the other end of the table.  Now all of my Mad Scientist fun can happen in one dedicated place . . .

Wednesday, December 7, 2011

Node/Keiki Culture - Dendrobium Lifeboat

I have mentioned previously that my Grandfather was an Orchidist, and even though he passed away years ago, my Grandmother still keeps a few orchids around the house.  These days they are mostly store-bought Phalaenopsis in the windowsill and a few random things out on the patio.

When I went to visit Grandma the other day, I noticed some dry Dendrobium canes leaning in an empty pot outside.  She is nearly 90, so she doesn't make it out there to water very often, and between that and the recent cold, this plant had wasted away.  The roots were dry and cracked (not even potted in any mix), and there wasn't a leaf to be found.  There were even a few well developed keikis that had made a start, withered, and died.  Even so, I noticed a few nodes that were developing a last ditch effort at new plants.

Dendrobium lifeboat!
©2011 MadOrchidist.com
I was offered the plant if I thought I could save it.  No way, but I realized these developing nodes would make a good experiment in my new mad laboratory.  I knew Phalaenopsis could be cultured in vitro from nodes on flower spikes and figured the same would be true of these nascent keikis, especially since they had already started to develop.  There's only one way to find out!

Cane Nodes cut from a dead(ish) Dendrobium
©2011 MadOrchidist.com
I brought it home and cut the canes up, leaving just a bit on either side of the three nodes with developing keikis I thought looked viable.  I realize now that I should have made more effort at this point to get all of the dry papery covering off, as this may be a source of contamination later - we'll see.


Orchid cuttings in sterile solution
©2011 MadOrchidist.com

I soaked them in a mild bleach solution for about 10 minutes, and prepared some sterile distilled water while I waited.  I already had empty flasks made up with media, and I didn't want to run the pressure cooker autoclave for just one jar of water, so i microwaved some distilled water in a jar.  I actually set the lid on too, which I know is not usually a good idea in the microwave, but its smooth surface did not allow any sparks to occur.  While not ideal, I hope this water is sterile enough to rinse my cuttings without adding contamination.

Boiled Distilled Water
©2011 MadOrchidist.com
Once the water cooled, I placed it, the cuttings (in sterilizing solution), and the necessary implements into my glove box, closed it up, and sprayed everything with bleach.


Tools in the Glove Box
©2011 MadOrchidist.com


Below is my view through the clear acrylic window in the top of the Glove Box:

My View while Working in the Box
©2011 MadOrchidist.com

Basically, I just scrubbed the cuttings with a toothbrush, cut off a little more at each end, and then placed each one into its own baby-food-jar flask.


Flasks in the Glove Box
©2011 MadOrchidist.com

Here is the result:

Developing Dendrobium in Flask
©2011 MadOrchidist.com


Result: More Orchids!
©2011 MadOrchidist.com


 There was actually one small "new lead" developing at the base of the withered mother plant too.  It had new root tips developing, and I opted to pot it up in sphagnum moss and try to grow it alongside the node flasks for comparison.

I have read that other folks doing this kind of culture at home have had a hard time with contamination due to the difficulty of completely sterilizing the cuttings.  Only time will tell if these proto-orchids will grow in the flasks, or something gross will grow instead!

Wednesday, November 30, 2011

Under Pressure - preparing flasks

I am continuing to collect equipment and supplies for my Orchid Flasking adventure and have taken another couple of steps closer to success.  A key component of that success will be sterility, and a key tool for that is an autoclave.

Mine was actually designed as a home pressure canner for preserving food (a giant pressure cooker), but that process has the same end in mind: a final product completely free of bacterial and fungal contamination.  As long as it can sustain at least 15 psi of pressure and 250° F it will accomplish that.  In my mad-scientist way, I rather enjoy the anthropomorphic thought of contaminating organisms landing in the freshly made nutrient media and "thinking" they have hit the jackpot, only to be utterly destroyed by this vintage piece of kitchenware.

The Beast - My Giant Pressure Cooker Canner
©2011 ColinFraser
Speaking of vintage, this thing is a classic.  It is a huge 20-Quart Presto from the 1970s and doesn't have any of the annoying safety interlocks of its modern counterparts.  The "Harvest Gold" enamel color attests to its age!  I bought it on eBay for $31 (plus some serious shipping - it's heavy), and I think I got a great deal because the "Harvest Gold" color has fallen out of style.  It reminds me of a Gibson Les Paul guitar from the 1950s whose mustardy color came to be known as "TV Yellow."  It was designed to show up well on black-and-white TV, but wasn't so popular after color caught on.

So, what goes in this monster?  Well, I ordered some pre-measured P668 Orchid Seed Germinating Media from the Orchid Seedbank Project.  Aaron sells it in packets that you just add to a liter of water and dissolve - simple.  I have also been collecting jars to put the media in.  My boss has been kind enough to set aside empty "palm hearts" jars for me, and I think those will make excellent replate flasks, but the most popular thing for Amateur Orchid Seed Germination ("mother flasks") is probably the 4oz baby food jar.  I don't, and never have had, kids; how else would I have time for all this Orchid Madness?!  So, I went back to eBay looking for empty jars.

Cleaning Jars in the Sink
©2011 ColinFraser
I ended up ordering some, and with shipping it worked out to a little over $0.50 per jar (the cheapest I could find them).  During the days while I waited for them to arrive in the mail, I actually looked at baby food in stores - the first time since I had to buy pureed fruit for my breeding Day Geckos years ago.  Imagine my surprise when I discovered that Walmart (I know, I know) has cheap baby food for $0.50 per jar; the food inside is worth less than the glass jar is!!  I could buy full jars, not wait for them to be shipped, feed the contents to my Scottish Terrier, and have them ready to go for the same price and less time than ordering them empty online!  What a crazy world . . .

Preparing to Fill the Clean Jars/Flasks
©2011 ColinFraser
I bought and emptied a few more jars, and my eBay purchases eventually arrived.  I removed the labels and any remaining glue, rinsed them well, soaked the jars and lids in hot bleach water in the sink for a while, and then rinsed them again.  Now my jars were ready to become flasks.

I added the media to a liter of distilled water, brought the mixture to a boil on the stove, and stirred while everything dissolved.  I let it cool slightly and then dispensed it into the jars with a "flavor injector" syringe.  There are almost 34 ounces in a liter, so it was no problem filling 30 jars with one ounce each.  I then put the lids on LOOSELY and arranged them all in the pressure cooker.

Following the manufacturers instructions (which I found online), I sealed it up and then vented the chamber for 10 minutes.  Once steam had displaced all of the air inside, I placed the pressure regulator over the vent, and the pressure began to build.

Sterilizing Heat and Pressure
©2011 ColinFraser
 When the gauge reached at least 15 psi and the regulator began to "jiggle,"  I let it run for at least 15 minutes at that level, before turning off the heat and letting it cool slowly.  My media was now autoclave sterilized and my "jars" had been transformed into "flasks."


The Agar in the Media Turns to Gel
©2011 ColinFraser
As the flasks cooled the media solidified, and I tightened the lids as I removed them from the pressure cooker.  I also intentionally opened one flask and exposed the media to the air for a few moments.  This will serve as my "contamination control" flask; it is virtually guaranteed to be contaminated.  When growth of contaminants is detectable in this flask, I can check it against the other ones, which will still hopefully be pristine.  At that point, I know that the remaining flasks are safe to use for Orchid Seed Sowing.  Neat huh?

Clean and Sealed
©2011 ColinFraser
Finally, I placed the cooled and sealed flasks into my still unfinished glove-box and misted bleach solution on and around them.  I let them sit for a bit; then I donned a pair of gloves, wiped each one, and wrapped some cling film around the lids.  Hopefully, this will prevent the entrance of contaminants if the flasks "breathe" a bit with changes in temperature and pressure.

Now all that's left to do is wait a couple of weeks and see how much, if any, contamination develops.  I have a couple of seed pods that are nearing readiness, so these flasks should be ready just in time!

Wednesday, November 23, 2011

Glove Box Construction

I made up my mind that I want to try growing Orchids from seed at home.  I am on a tight budget, so fancy laminar flow hoods with expensive HEPA filters are out of my reach for now; that leaves the "glove box" or "still air chamber" as the best option for maintaining the sterile conditions necessary for starting seeds in flasks.  I have started to build my own DIY version, so here are some photos of the progress so far:

My Mad Scientist Glove Box!
© 2011 ColinFraser

PVC cleanout fitting
© 2011 ColinFraser


Cutting holes in a plastic storage bin.
© 2011 ColinFraser


PVC cleanouts installed
© 2011 ColinFraser

Long Dish-Gloves attached to fittings with hose clamps
© 2011 ColinFraser


Add forceps and scalpels for a sciency look!
© 2011 ColinFraser

I also cut a window in the lid to accommodate a clear sheet of acrylic for easy viewing from above, but I have yet to secure the window to the lid . . .