Showing posts with label laboratory. Show all posts

Wednesday, February 29, 2012

Deflasking Seedlings

While waiting for some of my own orchid seeds to germinate and grow, I have been busy shopping.  Recently, I ordered flasks of several Schomburgkia (Laelia) hybrids from a grower on eBay:

Schomburgkia hybrid flasks from eBay
©2012 MadOrchidist.com
Flasks often get a little "scrambled" in shipping, so the seedlings usually need to come out fairly quickly.  One of these four was exceptionally jumbled, so it's where I'll start.
Orchid Seedlings and Agar in a Scrambled Flask
©2012 MadOrchidist.com
I had some nice New Zealand sphagnum moss on hand, so I decided to try it for potting these new seedlings.  I used some lava rocks in the bottom of the pots to bring the level up - no need to fill the whole pot with expensive moss!
Deflasking Materials
©2012 MadOrchidist.com

When the delicate little orchid seedlings first come out of the flask, conditions in the "real world" can be shocking to them; especially the lower humidity.  Many growers use plastic tubs or bags to maintain high humidity, and then "harden off" the seedlings by gradually introducing them to regular growing conditions.  I decided to use an old aquarium  I had in the garage to this effect.  It already had a nice compact fluorescent lamp in the hood too - bonus!

Seedling Humidity Chamber
©2012 MadOrchidist.com

OK, so it's time to get the little guys out of glass.  Rather than breaking the bottle, I simply ran some lukewarm water into it and swirled it around a bit.  Because this particular flask was already pretty jumbled up (and had a wide mouth), it was not difficult to flush all of the agar and plant material out into a large pyrex bowl.  The others I will probably have to break.

So here is what I got:
Flask Contents Rinsed into Bowl
©2012 MadOrchidist.com
I then began the arduous task of teasing the seedlings apart and rinsing as much agar media as possible off of them.  As expected, there were a handful of "heroes" (nice big growing seedlings) and also many smaller plants.  Here are the largest of the group separated out:
©2012 MadOrchidist.com
 After picking out everything that looked like it was worth trying to save, I was left with a bowl of media, broken roots and shoots, and some plants too tiny to bother with . . . the whole mess went right down the disposal in the kitchen sink.
Deflasking Leftovers
©2012 MadOrchidist.com 
The remaining plants went into Community Pots, or "compots."  I very carefully tried to get all of the roots covered in moss and then placed the pots into the humidity chamber.  There is a layer of lava rock on the bottom of the aquarium so that I can pour water in it to maintain high humidity.  I also tossed in a length of heat cable I had laying around; If I like how it works, I'll bury it in the lava.

Seedlings in Community Pots ("compots")
©2012 MadOrchidist.com
So there you have it.  Buying flasks is not only an economical (although patience requiring) way to get a lot of plants, it is the best way to get in on the "ground floor" with new hybrids.

One flask done, three more to go . . . .maybe tomorrow . . .

Tuesday, January 17, 2012

Safety In Numbers

This post is mostly about contamination, but I figured I had better start out with a picture of a beautiful orchid, lest I scare away any readers:
LaelioCattleya Frank Shadle
©2012 MadOrchidist.com
This is LC Franks Shadle, happily blooming away in (what I consider) frigid conditions outside right now (I am pretty sure it hit freezing last night).  This kind of temperature tolerance should definitely be selected for, and I have already pollinated the flower (as if there would be any question).

Anyway, on to the real issue at hand.  A little while ago, I had a marathon session in the glovebox flasking up some seeds I ordered on eBay.  I opted to make two flasks of each species as insurance against contamination.

Contaminated Flask
©2012 MadOrchidist.com
It is a cruel irony of orchid culture that if something goes wrong, you will probably find the unpleasant result very quickly, but if something goes right, it may take months (or years) on end to reward you.  Such is the case here.

Ascocentrum and Gastrochilus flasks contaminated
©2012 MadOrchidist.com
Two of the 8 total flasks in this group have grown a white fluffy fungus - one Gastrochilus bellinus and one Ascocentrum ampullaceum.  These are the two in which I was most interested, so I am glad to have a backup flask of each that appears uncontaminated.  Really, the fact that some flasks have turned up contaminated means I can probably breathe easy about those remaining.  After more than 2 weeks, none of this cohort has yet shown any signs of germination, but as with all things orchid, it could take a while . . .

So, having sown seeds in 18 mother flasks thus far in my laboratory career, two of them have grown something rather unpleasant.  That is a contamination rate of about 0.11 -- improvable, but also acceptable to me at this stage.

Of the remaining seed flasks, three Epidendrums have begun growing, and everything else shows no sign of life - either desirable or undesirable.  More waiting.

I have long been growing Orchids for their beautiful flowers, so I understand the waiting game, but there is a trick for the impatient like me.  If you have enough plants, the likelihood that something will be blooming at any given moment increases dramatically.  I remember becoming aware, several years ago, that I had reached this "critical mass" of Orchids.  My off the cuff estimate is that once you reach a couple of hundred different plants (provided they are of a variety of varieties), you can pretty much count on having at least something blooming all the time.

The Mad Orchidist in his natural habitat
I think that the same phenomenon will eventually kick in with my laboratory operation.  Right now, because I have a modest number of flasks and seed pods going, it sometimes seems as if nothing is happening.  If this adventure picks up momentum, which I hope it will, then at some point in the no-so-distant future it will seem that there is always something interesting going on.  Safety, and excitement, in numbers!

Friday, January 6, 2012

A Flask 6 Months in the Making

Back in July 2011 I attempted my first orchid pollination.  Since then I have been pollinating other flowers and learning/testing laboratory flasking procedures with seeds obtained elsewhere.  Now the seed capsule resulting from that first pollination attempt is mature, and it is finally time to put the lab to use with my own seeds!

Ripe Seed Pod with Coffee Filter Safety Net
©2012 MadOrchidist.com
I brought the pod-parent plant inside recently so that I could keep an eye on the ripening pod.  I have been propping a clean coffee filter under it to catch seeds in case it should burst when I'm not looking.  Well, today I caught it in the act.  I walked into my office and noticed that the end had suddenly turned yellow; closer examination revealed that it had begun to split open.  Time to harvest those seeds!

Dried LC Schilleriana Orchid, Cut From Ripe Seed Pod
©2012 MadOrchidist.com
Above is a photo of what's left of the original flower I pollinated - I'd say it's a bit less attractive now than it was nearly 6 months ago.  I snipped the pod from the plant and cut away the stem and dried flower remnant.

Preparing the Pod for Seed Harvesting
©2012 MadOrchidist.com
Since the capsule had only just begun to dehisce (dry and open), I helped it along a bit with a scalpel.  Here is what it looks like split open:
Splitting an Orchid Seed Pod
©2012 MadOrchidist.com

Since I didn't do anything new with cleaning and flasking the seeds, and all my glove-box photos look pretty much alike, I'll leave that part out of this post.  Instead, here are some more photos of the seeds to give a sense of scale to both their size (very small) and number (very large).

 Here is a low-power micrograph of the seeds still in a section of the capsule:
Orchid Seed Micrograph
©2012 MadOrchidist.com
 You can see some individually along the edge, but in the middle it is just a dense fluff of innumerable seeds.  I tapped and scraped out a bunch onto a clean sheet of white printer paper.  There are more seeds there than I could ever possibly need or want!  I sowed a portion of them into 4 mother flasks tonight and put a bunch more into cold storage.  That way, if these flasks become contaminated, I can try it again.

Thousands and Thousands . . . and Thousands of seeds
©2012 MadOrchidist.com
Below is my favorite picture of the day.  That is the razor sharp edge of a surgical scalpel, and each of those white flecks is a tiny seed!
Tiny Tiny Seeds on a Scalpel
©2012 MadOrchidist.com
It's one thing to know that Orchids have very small seeds; it's another entirely to look through the 'scope and really "feel" how small they are - or exhale while opening the capsule and see a cloud of them rise into the air . . . both experiences I feel richer for having had.

With my limited magnification power and light sources, it's hard to determine if there are viable embryos in there.  I didn't see anything that positively confirmed viability, but that doesn't necessarily rule it out either.  Time will tell . . .

Sunday, January 1, 2012

New Year's Flasking

Happy New Year!  2011 was the beginning of a new chapter in my orchid hobby, and I am looking forward to continuing the madness in 2012.  I started off right, with some ambitious orchid seed flasking.

A while back I ordered dry seeds of a few orchid species from Thailand on eBay.  They arrived in tidy little packets, and I popped them in the refrigerator for safe keeping until I could get around to them.  I actually only ordered the first two in the picture below; the seller threw in a couple of others.  What a nice surprise!

Gastrochilus bellinus, Ascocentrum ampullaceum,Dendrobium pachyphyllum, and Gastrochilus patinatus
©2012 MadOrchidist.com
Here's an open packet showing the bright yellow seeds of Dendrobium pachyphyllum:
Dendrobium pachyphyllum Seeds
©2012 MadOrchidist.com
And here are is a closeup of some of the Ascocentrum seeds using my iPhone and an antique dissecting microscope - what a cool combo!  If you look closely, you can see the fibers of the white printer paper to give you a sense of how small they are:
Ascocentrum ampullaceum seeds magnified under my stereo dissecting scope
©2012 MadOrchidist.com

I got a little ambitious and decided that I would try to sow all four species in one flasking session in the glove box.

Orderly Preparation - don't want to mix them up!
©2012 MadOrchidist.com
After numbering and labeling syringes to correspond to the right species and flasks, I got to sterilizing the seeds. 

Orchid Seed Solution
©2012 MadOrchidist.com

Since my first attempt hasn't yet shown any contamination, I used the same procedure for these seeds.  The biggest difference is that I did four syringes instead of one, and I only used the "filter" cap I made on one of them.  The others I just let settle a bit longer after every rinse to avoid squirting out too many seeds.

Once more into the box
©2012 MadOrchidist.com
Four at once turned out to be a bit more than was comfortable.  It required me to have a lot more stuff in the glove box (multiply empty flasks and sterile water jars by four), and the possibility for cross-contamination or a mix-up seemed high.

Crowded and Messy in the glove box
©2012 MadOrchidist.com
Finally, mother flasks of the four species are sealed and out of the box.  This took a while, and it made me realize how non-ergonomic my glove box is.  I have to hunch over it to get the best view through the acrylic window on top while working, and it gets to my neck eventually.

New Orchid Flasks
©2012 MadOrchidist.com
The whitish particles below are a thin layer of seeds and water in a finished flask.

Orchid seeds in vitro
©2012 MadOrchidist.com

Here are some representative photos of these species from the Internet Orchid Species Photo Encyclopedia (click on the name below a photo for more info).

Gastrochilus patinatus

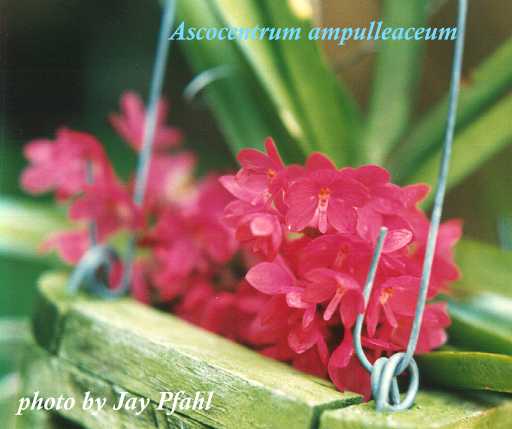
Ascocentrum ampullaceum

Dendrobium pachyphyllum
Gastrochilus bellinus

Monday, December 19, 2011

Flasking My First Orchid Seeds

This is what it's all about; sowing some Orchid seeds in flasks!  A couple of my own crosses capsules' are nearing maturity, but I couldn't pass up the opportunity to practice on some that just came along.

Epidendrum seed capsules ready for flasking
©2011 MadOrchidist.com
The other night was the Orchid Society Holiday Party.  Our host had some Reed-stem Epidendrums out in the yard that he says set seed all the time.  As it happened there was a dry pod that had split open and a green one still sealed, both on the same plant.  I have been considering whether I should go with the "green pod" method or wait for my pods to spit naturally and then sterilize the seed, and here was an opportunity to try both and compare!  He let me take them both to sacrifice to the learning process in my lab (thanks Van!).

Pod Parent Tag
©2011 MadOrchidist.com
Given that the Epidendrum was probably pollinated by an insect, I have no way of knowing what the pollen parent was.  All I know for sure is that the pod parent is pink; its tag is pictured above, plus I saw a few of the flowers on another spike.  Since this is sort of an experiment, I am not really worried about the pedigree.  If I end up growing anything from these they will be good for landscaping; Reed-stem Epis are practically bulletproof outdoors in this climate.  Let's hope the seeds are hardy too:

Epidendrum Orchid seed capsule dried and split open (dehisced), fine seeds visible
©2011 MadOrchidist.com

I decided to deal with the open capsule first.  Once an orchid seed pod dries, it splits open to release the thousands upon thousands (sometimes even millions) of tiny seeds inside.  After this happens, the seeds must be considered contaminated and their surfaces sterilized before sowing.

Epidendrum Orchid Seeds being sterilized in a syringe
©2011 MadOrchidist.com
I opted to use household bleach in a ratio of one part bleach to nine parts distilled water as my sterilizing solution.  Several online tutorials and discussions recommended using a syringe to clean the seeds.  I bought dispensing syringes with caps on Amazon.com and made one cap into a filter by melting a couple of holes in it with a heated pin and then placing a small piece of coffee filter inside.

Basically, I drew up about 10mL of the sterilizing solution through the filter cap and then banged the syringe on my hand and the table for at least ten minutes to try and eliminate all of the tiny air pockets that cause the seeds to float and prevent the solution from doing its job.  Below is a close up photo of the tiny orchid seeds in the syringe of sterilizing bleach solution:

Tiny Epidendrum Orchid seeds floating in sterile solution
©2011 MadOrchidist.com
 I put the syringe, several jars of autoclave sterilized distilled water (for rinsing seeds), a few pre-made flasks with seed sowing media, and a jar of stronger bleach solution (to clean the outside of the syringe and any tools I used) into my Glove Box and sealed it up.


Tools and materials in the glove box
©2011 MadOrchidist.com
It is unfortunately impossible for me to have my hands in the gloves working and take pictures at the same time.  At some point a small tripod and/or an intrepid volunteer will enable me to post more photos of what goes on inside the sterile glove box.

Briefly, I squirted out the bleach solution, drew up a rinse of distilled water a couple of times, and then squirted a small remaining amount of water with the seeds into a few flasks.  The result is pictured below:

Tiny Orchid Seeds in Flask
©2011 MadOrchidist.com

I got some seeds on the sides of the flask, but there are plenty in there on the agar media too.  I also ended up with more water than I would have liked in the flasks, so we'll see if that hurts things any.

I'll try to get to the green pod tonight or tomorrow so that I can make a fair comparison of the results.  I also received some seeds today in the mail that I ordered from Thailand on eBay.  I think I will give today's flasks a few days to see if contamination develops, so I can change my methods if necessary before trying again.  For now, those seeds will go into my pollen storage unit in the refrigerator.

As for these flasks, now we wait . . . it's a theme with orchids . . . 


Failure is Always an Option

Well the point of this blog is, at least partly, to keep track of my Orchid culture progress, so I would be remiss not to include the occasional failure.  Here are a few things that have not gone according to plan lately.

These first few photos are of flowers that were pollinated, but then withered away without developing a seed pod.  I am willing to give up enjoyment of the flower in return for a seed pod, but when you lose both it really stinks!

Cattleya flowers that were pollinated, but never went anywhere
©2011 MadOrchidist.com

Another Orchid Dud!
©2011 MadOrchidist.com


Laelia anceps that never developed pods - bummer, I had high hopes for these . . .
©2011 MadOrchidist.com 


These next few pictures are of the Dendrobium nodes that I flasked up in this post.  All three of them developed contamination.


contaminated Dendrobium node flask
©2011 MadOrchidist.com


The same flask as above, a few days earlier - that stuff grows fast!
©2011 MadOrchidist.com


The other two flasks developed fuzzy fungus
©2011 MadOrchidist.com

I had acknowledged previously that stems are tough to get completely sterile for this type of culture; now I know first-hand.  I could try to clean and replate them, but they were really just for practice and I'll probably let them go.

So, with some failures under my belt, I feel like I am making progress.  Next, on to some seed sowing . . .


Thursday, December 8, 2011

Laboratory Upgrade!

Today my Home Laboratory got a big upgrade!

Laboratory Stainless Steel Table!
©2011 MadOrchidist.com
 My boss gave me an old metal restaurant/laboratory table that the business no longer had a place for (thanks Pat). It has an 8 foot long, 2-1/2 foot wide stainless steel surface; you should have seen me unloading it from the truck by myself!  It has plenty of space to move all of my equipment out of the house and set up in the garage.

Moving the Equipment In
©2011 MadOrchidist.com
Once I moved everything to its new place, I got my dining room table and kitchen back!  Here is a picture of the situation before:


And After:

Now That's Sceincey!  Note My Antique Dissecting Scope At The Left.
©2011 MadOrchidist.com
There is even room for my insect collection stuff at the other end of the table.  Now all of my Mad Scientist fun can happen in one dedicated place . . .

Wednesday, December 7, 2011

Node/Keiki Culture - Dendrobium Lifeboat

I have mentioned previously that my Grandfather was an Orchidist, and even though he passed away years ago, my Grandmother still keeps a few orchids around the house.  These days they are mostly store-bought Phalaenopsis in the windowsill and a few random things out on the patio.

When I went to visit Grandma the other day, I noticed some dry Dendrobium canes leaning in an empty pot outside.  She is nearly 90, so she doesn't make it out there to water very often, and between that and the recent cold, this plant had wasted away.  The roots were dry and cracked (not even potted in any mix), and there wasn't a leaf to be found.  There were even a few well developed keikis that had made a start, withered, and died.  Even so, I noticed a few nodes that were developing a last ditch effort at new plants.

Dendrobium lifeboat!
©2011 MadOrchidist.com
I was offered the plant if I thought I could save it.  No way, but I realized these developing nodes would make a good experiment in my new mad laboratory.  I knew Phalaenopsis could be cultured in vitro from nodes on flower spikes and figured the same would be true of these nascent keikis, especially since they had already started to develop.  There's only one way to find out!

Cane Nodes cut from a dead(ish) Dendrobium
©2011 MadOrchidist.com
I brought it home and cut the canes up, leaving just a bit on either side of the three nodes with developing keikis I thought looked viable.  I realize now that I should have made more effort at this point to get all of the dry papery covering off, as this may be a source of contamination later - we'll see.


Orchid cuttings in sterile solution
©2011 MadOrchidist.com

I soaked them in a mild bleach solution for about 10 minutes, and prepared some sterile distilled water while I waited.  I already had empty flasks made up with media, and I didn't want to run the pressure cooker autoclave for just one jar of water, so i microwaved some distilled water in a jar.  I actually set the lid on too, which I know is not usually a good idea in the microwave, but its smooth surface did not allow any sparks to occur.  While not ideal, I hope this water is sterile enough to rinse my cuttings without adding contamination.

Boiled Distilled Water
©2011 MadOrchidist.com
Once the water cooled, I placed it, the cuttings (in sterilizing solution), and the necessary implements into my glove box, closed it up, and sprayed everything with bleach.


Tools in the Glove Box
©2011 MadOrchidist.com


Below is my view through the clear acrylic window in the top of the Glove Box:

My View while Working in the Box
©2011 MadOrchidist.com

Basically, I just scrubbed the cuttings with a toothbrush, cut off a little more at each end, and then placed each one into its own baby-food-jar flask.


Flasks in the Glove Box
©2011 MadOrchidist.com

Here is the result:

Developing Dendrobium in Flask
©2011 MadOrchidist.com


Result: More Orchids!
©2011 MadOrchidist.com


 There was actually one small "new lead" developing at the base of the withered mother plant too.  It had new root tips developing, and I opted to pot it up in sphagnum moss and try to grow it alongside the node flasks for comparison.

I have read that other folks doing this kind of culture at home have had a hard time with contamination due to the difficulty of completely sterilizing the cuttings.  Only time will tell if these proto-orchids will grow in the flasks, or something gross will grow instead!